Banana Bread


Gather Up

1 stick (8 TB) Organic Butter

(or 8 TB Nutiva SuperFood Shortening)

1 cup Golden Lakanto (or 3/4 cup Birch Xylitol)

2 large Eggs

(or 8 TB “JingSlinger Chia Eggs”)

1 cup fine milled Almond Flour

½ cup Arrowroot Flour

½ cup Coconut Flour

3 medium-large very ripe Bananas, mashed


1 - 1 ½ cups rough chopped Walnuts

1 teaspoon Cinnamon

2 teaspoons Vanilla Extract

4 TB Grassfed Cream

(or full-fat Coconut Milk )

¼ teaspoon Baking Soda

¼ teaspoon Baking Powder

2 teaspoons Lemon Juice

½ teaspoon Vanilla Crème Stevia (Sweetleaf brand)

(add more sweetener to taste)

Jing It Up (Options)

1 teaspoon Pearl Powder

1 teaspoon Maca Powder

2 teaspoons Bulletproof Brain Octane Oil

½ cup Lilly’s Sugar-Free Chocolate Chips

Sling It Up

Incorporate the butter and Lakanto/birch xylitol with the vanilla stevia and vanilla extract with your hand mixer or stand mixer.

Sift all the dry ingredients until well mixed in a separate bowl.

Mix in one egg (or tablespoon of chia egg) at a time into the butter/sweetener bowl until well blended.

Next stir in the dry ingredients ½ cup at a time (except walnuts & chocolate chips), until fully incorporated.

Add the lemon juice and grassfed cream (or full-fat coconut milk) and Brain Octane Oil, and mix well.

Hand mix in the mashed banana and taste for sweetness. Add any additional sweetener if desired or coconut milk/cream for a thinner batter consistency. Batter should be the consistency of frosting or almond butter.

Hand mix in the walnuts and chocolate chips.

Pour into a greased (grassfed butter or coconut oil) loaf pan/dish and bake at 365 degrees.

Cook in your oven on the middle of the middle shelf. Usually takes about 45-60 minutes in a convection oven. The banana bread is ready when a toothpick tests clean from the center of the bread and the top is golden brown.

Thrillah Vanillah… Batter Up! (vegan)

Voila! Vegan Vanilla CakeCuppery for every celebration! Armed with this Gluten-Free, Sugar-Free, Soy-Free JingSlinger recipe in your “I Can’t Believe It’s Vegan” repertoire will have your friends saying, “Reci-Please!” Sling this better batter to avoid sugar crashes and glycation. Plus vanillic acid has also been shown in studies to alleviate inflammation via the NF-Kb and COX-2 pathways. Too much science? Just make the Cupcake!

Gather Up

Organic Coconut Milk

½ cup (110ml) Coconut Oil, melted

3 tsp Vanilla Stevia

2 tsp Vanilla Extract

2 tsp White Vinegar

2 tsp Lemon Juice

1 TB Water

½ tsp Sea Salt

⅛ tsp Almond Extract

1¼ cup (155g) Pamela’s Artisan Blend

All-Purpose Flour

1¼ cup (250g) Xylitol Powder

½ tsp Baking Soda

1 tsp Baking Powder

⅛ tsp Vanilla Bean Powder

3 TB Honeyville Blanched

Ultra Fine Almond Flour

1¼ cup (310ml) Pacific Unsweetened


Jing It Up (options)

1 tsp Maca

1 tsp MCT Oil


Sling It Up

Preheat oven to 375°F/191°C. Lightly coconut oil the pan(s) and dust with the gluten-free flour. In cake pans, add a piece of parchment paper cut to fit the bottom of the pan.

In one large bowl, combine all of the dry ingredients, except for the almond flour. In your blender, add the almond flour, along with your wet ingredients: Pacific unsweetened coconut milk, vanilla extract, vanilla stevia, coconut oil, white vinegar and lemon juice and blend on a medium setting. Blend for 30 seconds. Immediately pour the wet ingredients from the blender into the dry ingredients and mix with a large spoon or spatula until all the lumps are gone. Add the remaining one tablespoon of water to smooth and finish the batter. Quickly pour the batter into the prepared pan(s) and place in the oven. It is important to work fast, so you don’t lose the rise from the (al)chemical reaction that makes the cake light and springy.

Bake at 375°F/191°C in the center rack of the oven until a toothpick comes out clean. It is IMPORTANT not to open the oven during the first half of the baking time, however checking with a wooden toothpick at the center of the pastry will tell you when it is done. Everyone’s oven is different and convection ovens always bake faster. Your physical climate and elevation also affects the level of rise and length of cook time. Here are baking guidelines for this batter:

10-15 minutes for Madeleines and Whoopie Pies

15-20 minutes for Cupcakes and Doughnuts

30-40 minutes for 4-6 inch (10-15cm) Cakes

40-60 minutes for 8-10 inch (20-25cm) Cakes

Allow it to cool in the fridge before icing, coating or glazing.

Top with out Coconut Whipped Cream!

JingSlinger Chocolate Sauce

Heirloom Chocolate, the "Food of the Gods," is loaded with a staggering array of nutrients and feel-good complex compounds. This ain't your dime-store chocolate! This recipe is the glaze for our Epic Eclairs, it is the chocolate shell and ripples in our JingLatos, it is what our Doughnuts prefer to be dressed in...there are so many uses for this one recipe throughout this cookbook! 

Cacao beans are stacked with cell supporting minerals such as calcium, chromium, iron, magnesium, and zinc, as well as many different types of antioxidants. It is jam-paled with neurotransmitters such as PEA and anandamide, which is known as the "bliss chemical." Cacao also brings tryptophan to the table, a precursor to serotonin. Cacao contains several vasodilators, making it one of our favorite ingredients for combining with additional SuperFoods and Tonic Herbs for better delivery. 

Gather Up

1 cup (125g) Cacao Powder, sifted
1/4 cup (60ml) Coconut Oil, melted
1/4 cup (6oml) Cacao Butter, melted
1/2 cup (200g) Xylitol Powder, sifted
1/2 tsp Vanilla Stevia
1/2 tsp Chocolate Stevia

Jing It Up (options)

1 tsp He Shou Wu
1 tsp Pearl Powder
1 tsp Restore the Jing

Sling It Up

Over a medium saucepan containing about two inches of water, simply fit a heatproof metal bowl on top, so that the bottom of the bowl is not touching the water. Bring the water to a simmer, then turn it down to low heat. Add the coconut oil and cacao butter to the bowl and stir once they are liquid. Add the stevia and stir well. Add the sifted cacao powder and xylitol powder, stirring until well incorporated. Sprinkle in your Jing It Up options, while stirring. Taste the chocolate and if you would like it sweeter, add additional sifted xylitol powder, one tablespoon at a time until it reaches your desired sweetness. 

Chic Cheat - Quick & Easy Melted Chocolate Glaze

Melt 9oz (255g) of Lily's Sugar-Free Chocolate Chips (or a Lily's Chocolate Bar roughly chopped) along with a teaspoon of MCT oil or a teaspoon of ghee in a heatproof bowl over two inches of simmering water in a medium size pan (so that the water does not touch the bottom of the bowl). This is an instant chocolate shell, just looking for ice cream! Or mix with an equal amount of puffed quinoa and spoon into silicone molds and refrigerate for a crunchy chocolate treat and cupcake accessory. 

Acai Triple Berry JingLato

This is one of our all-time favorite JingLatos. There are endless combinations of SuperFoods and Tonic Herbs that can go into this ice cream, particularly anything that plays nicely with berries. We love the anti-inflammatory effects of the acai berry and the blueberry base. E3Live Blue Majik can up the ante even further, while melding seamlessly into the flavor. Arnox Advantage increases nitric oxide and the circulatory properties of this dessert, while boosting a strawberry flavored undertone. Want it calming, with a floral undertone? Add rose water. Want to boost the anabolic effect? Add the colostrum, or add protein powder. It’s easy to enjoy this JingLato on a regular basis, because it has so many options, and makes you feel so good! 

Acai Triple Berry Jinglato Ingredients
Acai Triple Berry Jinglato

Gather Up

2 packets (200g) Unsweetened Frozen Acai
¾ cup (144g) Frozen Wild Blueberries
½ cup (120 ml) Coconut Milk
½ TB Lecithin
1 TB Acai Powder
1 TB Xylitol Powder
¼ tsp Vanilla Stevia
Pinch of Sea Salt

Jing It Up (options)

½ tsp Rose Water
½ tsp E3Live Blue Majik Powder
½ TB Arnox Advantage
½ TB Miracle Reds
2 TB Colostrum Powder
2 TB Collagen Powder, Whey Protein, or Vanilla Vegan Protein

Primal Paleo (option)

Want to take it to the next level? Add ¼ cup (100g) of grass-fed bison bone marrow. Add an additional 1-2 TB of lecithin powder to help the marrow integrate into the JingLato, which will end up with a much lighter, mousse-like consistency. 

Sling It Up

Add the coconut milk to your blender. Run the acai packets under room temperature water for 3-5 seconds, then break them into 4-6 pieces and cut them open. Place the frozen acai, along with the rest of your ingredients and Jing It Up options into the blender. Pound with your tamper, until smooth and thick. 

BuckShot

Nutrient dense enough to be a meal on the go, yet delicious enough to be dessert. This vanilla frosting can be eaten as a power-packed snack, or can be used as a kick-ass icing and also a cream filling on pretty much anything.

Buckshot

Jing It Up (options)

1 TB Collagen Powder (optional)
½ tsp Deer Antler
1 tsp Pearl  Powder
A pinch of Sea Salt

Gather Up

¼ cup (30g) Colostrum Powder
¼  cup (85g) Ghee
2 TB  Whey Protein Powder
¼ tsp Vanilla Stevia
1 tsp Birch Xylitol Powder
OR
1 TB Organic Raw Honey
A pinch of Sea Salt

Sling It Up

Mix all ingredients in a small bowl, stirring well until fully incorporated and smooth. The ghee should be soft, if your ghee is hard at room temperature, you can soften it by simply stirring it  and creaming it into the powders vigorously... a little kitchen Cross-Fit for your forearms. If your whey powder is already sweetened, then adjust your sweeteners of choice accordingly. This recipe doesn’t need to be refrigerated because ghee is stable at room temperature. BuckShot travels beautifully in a sealed container for days.

Vegan icing doesn’t have the same anabolic bang of the Paleo version BUT here is the swap out - 
1 cup raw Thai Coconut Meat, ⅓ cup SuperFood Shortening, ¼ cup Coconut Milk, ¼ cup Xylitol Powder, 2 TB of your favorite Vanilla Protein Powder, Vanilla Stevia to taste. Blend the coconut meat and milk in your food processor and add the remaining ingredients blending until icing smooth.

Cacao Jumped Over the Moon CakePhoria

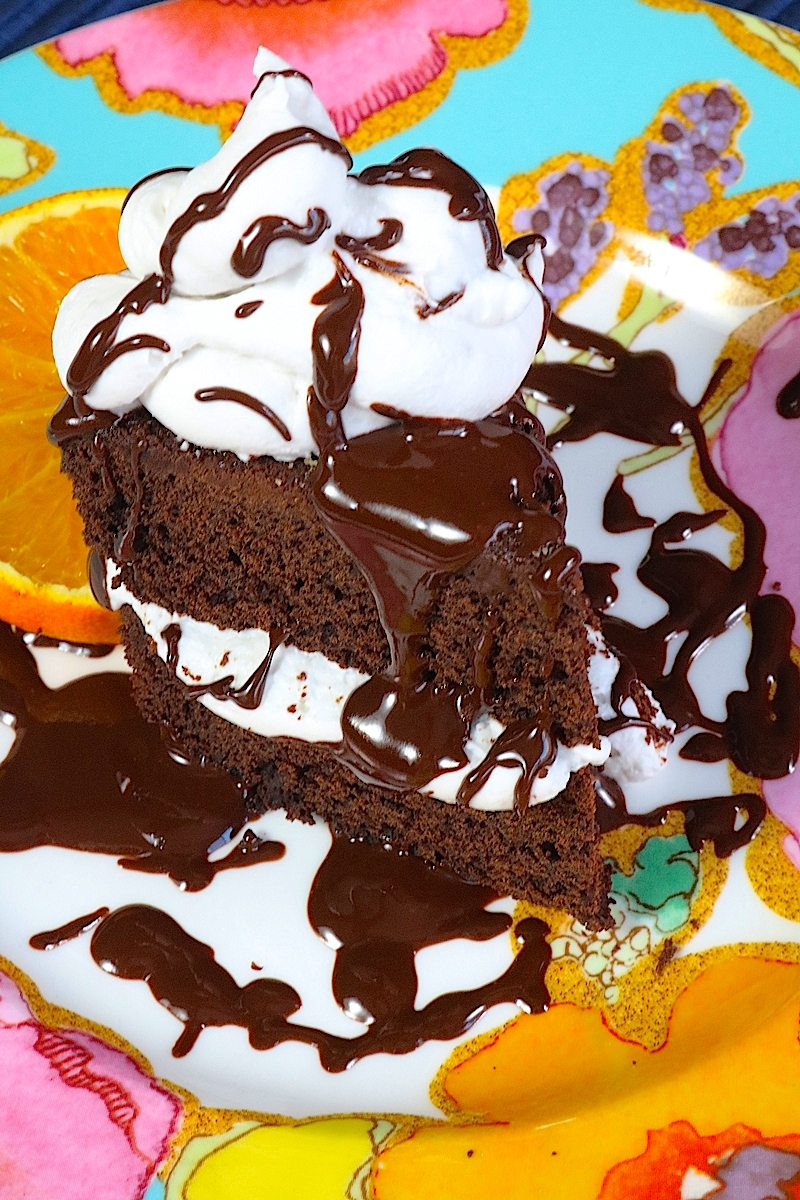
Flourless, Grain-Free, Sugar-Free, Paleo Chocolate Cake Bliss... this is a magnesium, anandamide and protein packed behemoth, it is a celebration on a plate! Dress this with Coconut Whipped Cream, fresh berries and a drizzle of our melted JingSlinger Chocolate Sauce for a 5 star restaurant experience without a sugar crash. The stress reducing magnesium and mood elevating anandamide are nutritional ninjas that will help centered and somewhat euphoric... hence “CakePhoria!”

Cacao Jumped Over the Moon Cakephoria

Gather Up

16 oz (454g) Lily's Sugar-Free Dark Chocolate Baking Chips
(or Lily’s Bars, chopped)
10 Large Eggs, separate the yolks from the white
(no yolks at all in the whites!)
¾ - 1 cup of Xylitol Powder (or more to taste) 
8 TB (112g) Unsalted Butter
1 tsp Vanilla Extract
½ tsp Vanilla Stevia
1 tsp Chocolate Stevia
⅛ tsp Cream of Tarter
Fresh Raspberries (optional garnish)

Jing It Up (options)

2 tsp Restore the Jing
1 tsp Pearl Powder
1 tsp Maca Powder
1 tsp Chaga Powder

Sling It Up

Preheat the oven to 350°F/177°C. 

Butter an 8, 9, or 10-inch (20, 23, or 25cm) spring form pan or several 3 or 4-inch (8 or 10cm) cake pans for individual servings and place an unbleached circle of parchment in the bottom. (We always wrap the outside bottom of the spring form pan with tin foil so no water seeps into the cake pan while baking.) Add 2 inches of hot water into a larger oven safe pan so your cake bakes in a water bath. 

Put the chocolate chips/ chopped bars and butter into the top of a double boiler (or in a heatproof metal bowl) and heat over (but not touching) about 1 inch of simmering water until melted.

Meanwhile, whisk the egg yolks with the xylitol powder in a mixing bowl until light yellow in color. Whisk a little of the chocolate mixture into the egg yolk mixture, once the chocolate has fully melted, to temper the eggs - this will keep the eggs from scrambling from the heat of the chocolate - then whisk in the rest of the chocolate mixture, stirring in the herbs, vanilla extract and vanilla stevia & chocolate stevia. Set aside.

Beat the egg whites and cream of tarter in a mixing bowl until stiff peaks form (a stand mixer works best, but an electric hand mixer works too). Now fold the chocolate mixture into the egg white mixture a quarter at a time, with a large spoon or spatula until it becomes a well-incorporated chocolate batter. Pour into the prepared pan and bake for about 35-45 minutes, until a toothpick inserted into the cake comes out mostly clean with some moist crumbs. Let it cool for about 30 minutes at room temperature and then chill in fridge for an additional 20-30 minutes to set. Then you can remove the sides of pan. For the small pans, run a knife or thin bladed spatula around the inside edge to release the cake.

Serve cake at room temperature with berries and topped with Coconut Whipped Cream.


Cacao Jumped Over the Moon Cakephoria

Chia Pudding 101

Famous because of the Chia Pet craze of the 1980s, chia seed became famous as a SuperFood when it was written about as a staple in the diet of the Tarahumara Native Americans, the greatest ultra distance runners in the world, in the 2009 New York Times Bestselling Book “Born to Run.” As the name suggests, “Chi-a” (Chi/Qi) is a high-energy and endurance food. It is very hydrophilic, it’s loaded with soluble fiber, which gelatinizes in liquid. Gelatinize some chia seed, add some protein, some fat and you’re good to go. Add some additional SuperFoods and Tonic Herbs, and you are WAY good! When gelatinizing chia seed, your liquid should to be at least room temperature. Cold liquids do not work well. When using most protein powders, or a polyunsaturated fat like Styrian pumpkin seed oil, keep the temperature down below 120°F/49°C. If you are using collagen powder and saturated fats with high heat tolerances, you can make a hot Chia Pudding, which is excellent in the winter months. 

Chia Pudding 101

Gather Up

1 cup (250ml) Coconut Milk
½ cup (120ml) Water
¼ cup (50g) Chia Seeds
2 TB Whey Protein/ Vanilla Vegan Protein
½ tsp Vanilla Stevia
1 tsp Xylitol Powder (or more to taste)

Jing It Up (options)

1 tsp Pearl Powder
½ tsp Vanilla Bean Powder  
1 tsp – 1 TB MCT Oil
1 TB Ghee/ Coconut Oil
2 TB Colostrum Powder

Sling It Up

Add the coconut milk and water to a small pan and heat on the stove to about 110°F/43°C so it’s just hot to the touch. Remove from stove and transfer to a heatproof container, like a Pyrex measuring cup. Add the chia seeds. Stir well, and continue stirring a couple times per minute, for about 10 minutes, or until it gelatinizes to a thick consistency.

Add the soaked chia seeds into your blender and add the rest of your ingredients. 

Coconut Crème Brûlée Divinity

Our Rock Star approved buttery Crème Brûlée infused with fragrant raw vanilla bean and spun from coconut meat, coconut cream, coconut oil, and coconut milk is the perfect nosh any time of the day.  It is extremely hydrating, assists with rejuvenating oxidative tissue damage and supports the function of our nervous system. The concentrated MCT oil helps burn fat and fuels your brain while the caprylic, capric and lauric acid properties are antimicrobial, antifungal and antibacterial so your immune system gets some love too… Oh… and it is flippin’ delicious. 

Coconut Creme Brûlée Divinity

Gather Up

2 cups (454g) Raw Young Thai Coconut Meat
½ cup (120ml) Coconut Cream
⅓ cup (75ml) Coconut Milk
1 TB of Coconut Oil
½ cup Xylitol Powder
2 TB Sunflower Lecithin Powder
¼ tsp Vanilla Bean Powder
½ tsp Vanilla Extract
1 tsp Vanilla Stevia
¼ tsp Sea Salt

Jing It Up (options)

2 tsp Pearl Powder
1-2 TB Ghee
1 TB MCT Oil
1 TB Collagen Powder

Sling It Up

If you do not have a high performance blender simply process all of the ingredients in your food processor and then transfer it to your blender to blend until smooth. This recipe can be prepared with a food processor only, however the texture will not be the silky smooth Crème Brûlée we love to serve. 

This Crème Brûlée can be served in small ramekins topped with our JingSlinger Chocolate Sauce and chilled.  It can also be spooned into either one of our Pie Crusts, dressed with sliced fresh bananas or layered with berries and then crowned with Chocolate Whipped Cream and toasted coconut flakes for our
“Pie’s The Limit!”


Coconut Ice Cubes

Coconut Ice Cubes

Gather Up

1½ cups (370ml, or 1 can) Coconut Milk
¼ tsp Vanilla Stevia

Sling It Up

Stir the coconut milk and stevia together in a Pyrex-type measuring cup, dissolving any lumps in the coconut milk. If using a silicone Tovolo ice cube tray (see photo on page 98) there will be exactly enough liquid to fill it up. If you have different ice cube trays, adjust accordingly, just know that this 1½ cup (370ml) of Coconut Ice Cube measure is what we will be working with for proportions when we make our JingLato. If you do well with dairy and have access to organic raw cream, then it will also work stellar for making ice cubes. 

When using Coconut Ice Cubes, once they are frozen solid, you will always want to let them sit at room temperature for about 10 minutes just before using them. This will allow them to soften just a bit. They will be much easier to pop out of their trays, and will have a little more give in the blender.

I Love You Berry Much

This strawberry ice cream is just as good as the one you had growing up, but carries more nutrition in its back pocket then most five star meals. Its fresh farm-to-table real strawberry flavor will take you back to the tire swing in your nana’s backyard, delightfully lapping up a cone full of this homemade magic. Ice cream loves its natural match, as pictured here canoodling with our signature Chocolate Cake and wrapped in our Coconut Whipped Cream.

Raise the vibration of this libation with Rose Water, which opens your heart and brightens your spirit. Did you know that Strawberries are part of the Rose family? It makes them a perfect pairing. 

I Love You Berry Much

Gather Up

1½ cups (130g) Frozen Strawberries
1/3 tray (130g) Coconut Ice Cubes
¼ cup (60ml) Coconut Milk
1 TB Xylitol Powder
¼ tsp Vanilla Stevia
Fresh Strawberries (optional garnish)
Chocolate Covered Hemp Seeds (optional garnish)

Jing It Up (options)

1 TB MCT Oil
1 tsp Pearl Powder
½ tsp Rose Water
½ TB Arnox Advantage
½ TB Miracle Reds
2 TB Collagen Powder, Whey Protein or Vanilla Vegan Protein 

Sling It Up

Place half of your frozen strawberries (¾ cup, 65g) in a medium-sized metal bowl and let them sit at room temperature for 10 minutes. Next, set your frozen Coconut Ice Cubes and the second half of your frozen strawberries on the counter. Let them sit for 10 minutes to slightly soften, allowing the strawberries in your metal bowl to continue softening. 

Next, mash the strawberries in the metal bowl with a large fork. Pour your coconut milk into your blender and add all of your ingredients, except for the mashed strawberries in the bowl, into your blender. Pound with your tamper, until thick and smooth. 

Spoon your JingLato out of the blender and pour into the bowl. Mix well with the mashed strawberries. 

Garnish with additional fresh strawberries and chocolate covered hemp seeds.  

I Love You Berry Much

Jing Jam

Jing Jam

Gather Up

3 cups (750ml) Pomegranate Juice
½ cup (80g) Chia Seeds
1½ cups (345g) Raspberries (frozen or fresh)
1-2 TB Xylitol (to taste)
½ tsp Vanilla Stevia

Jing It Up (options)

1 tsp Freeze-Dried Acai Powder
1 tsp Freeze-Dried Maqui Powder
2 tsp Miracle Reds Powder
2 tsp Arnox Advantage

Sling It Up

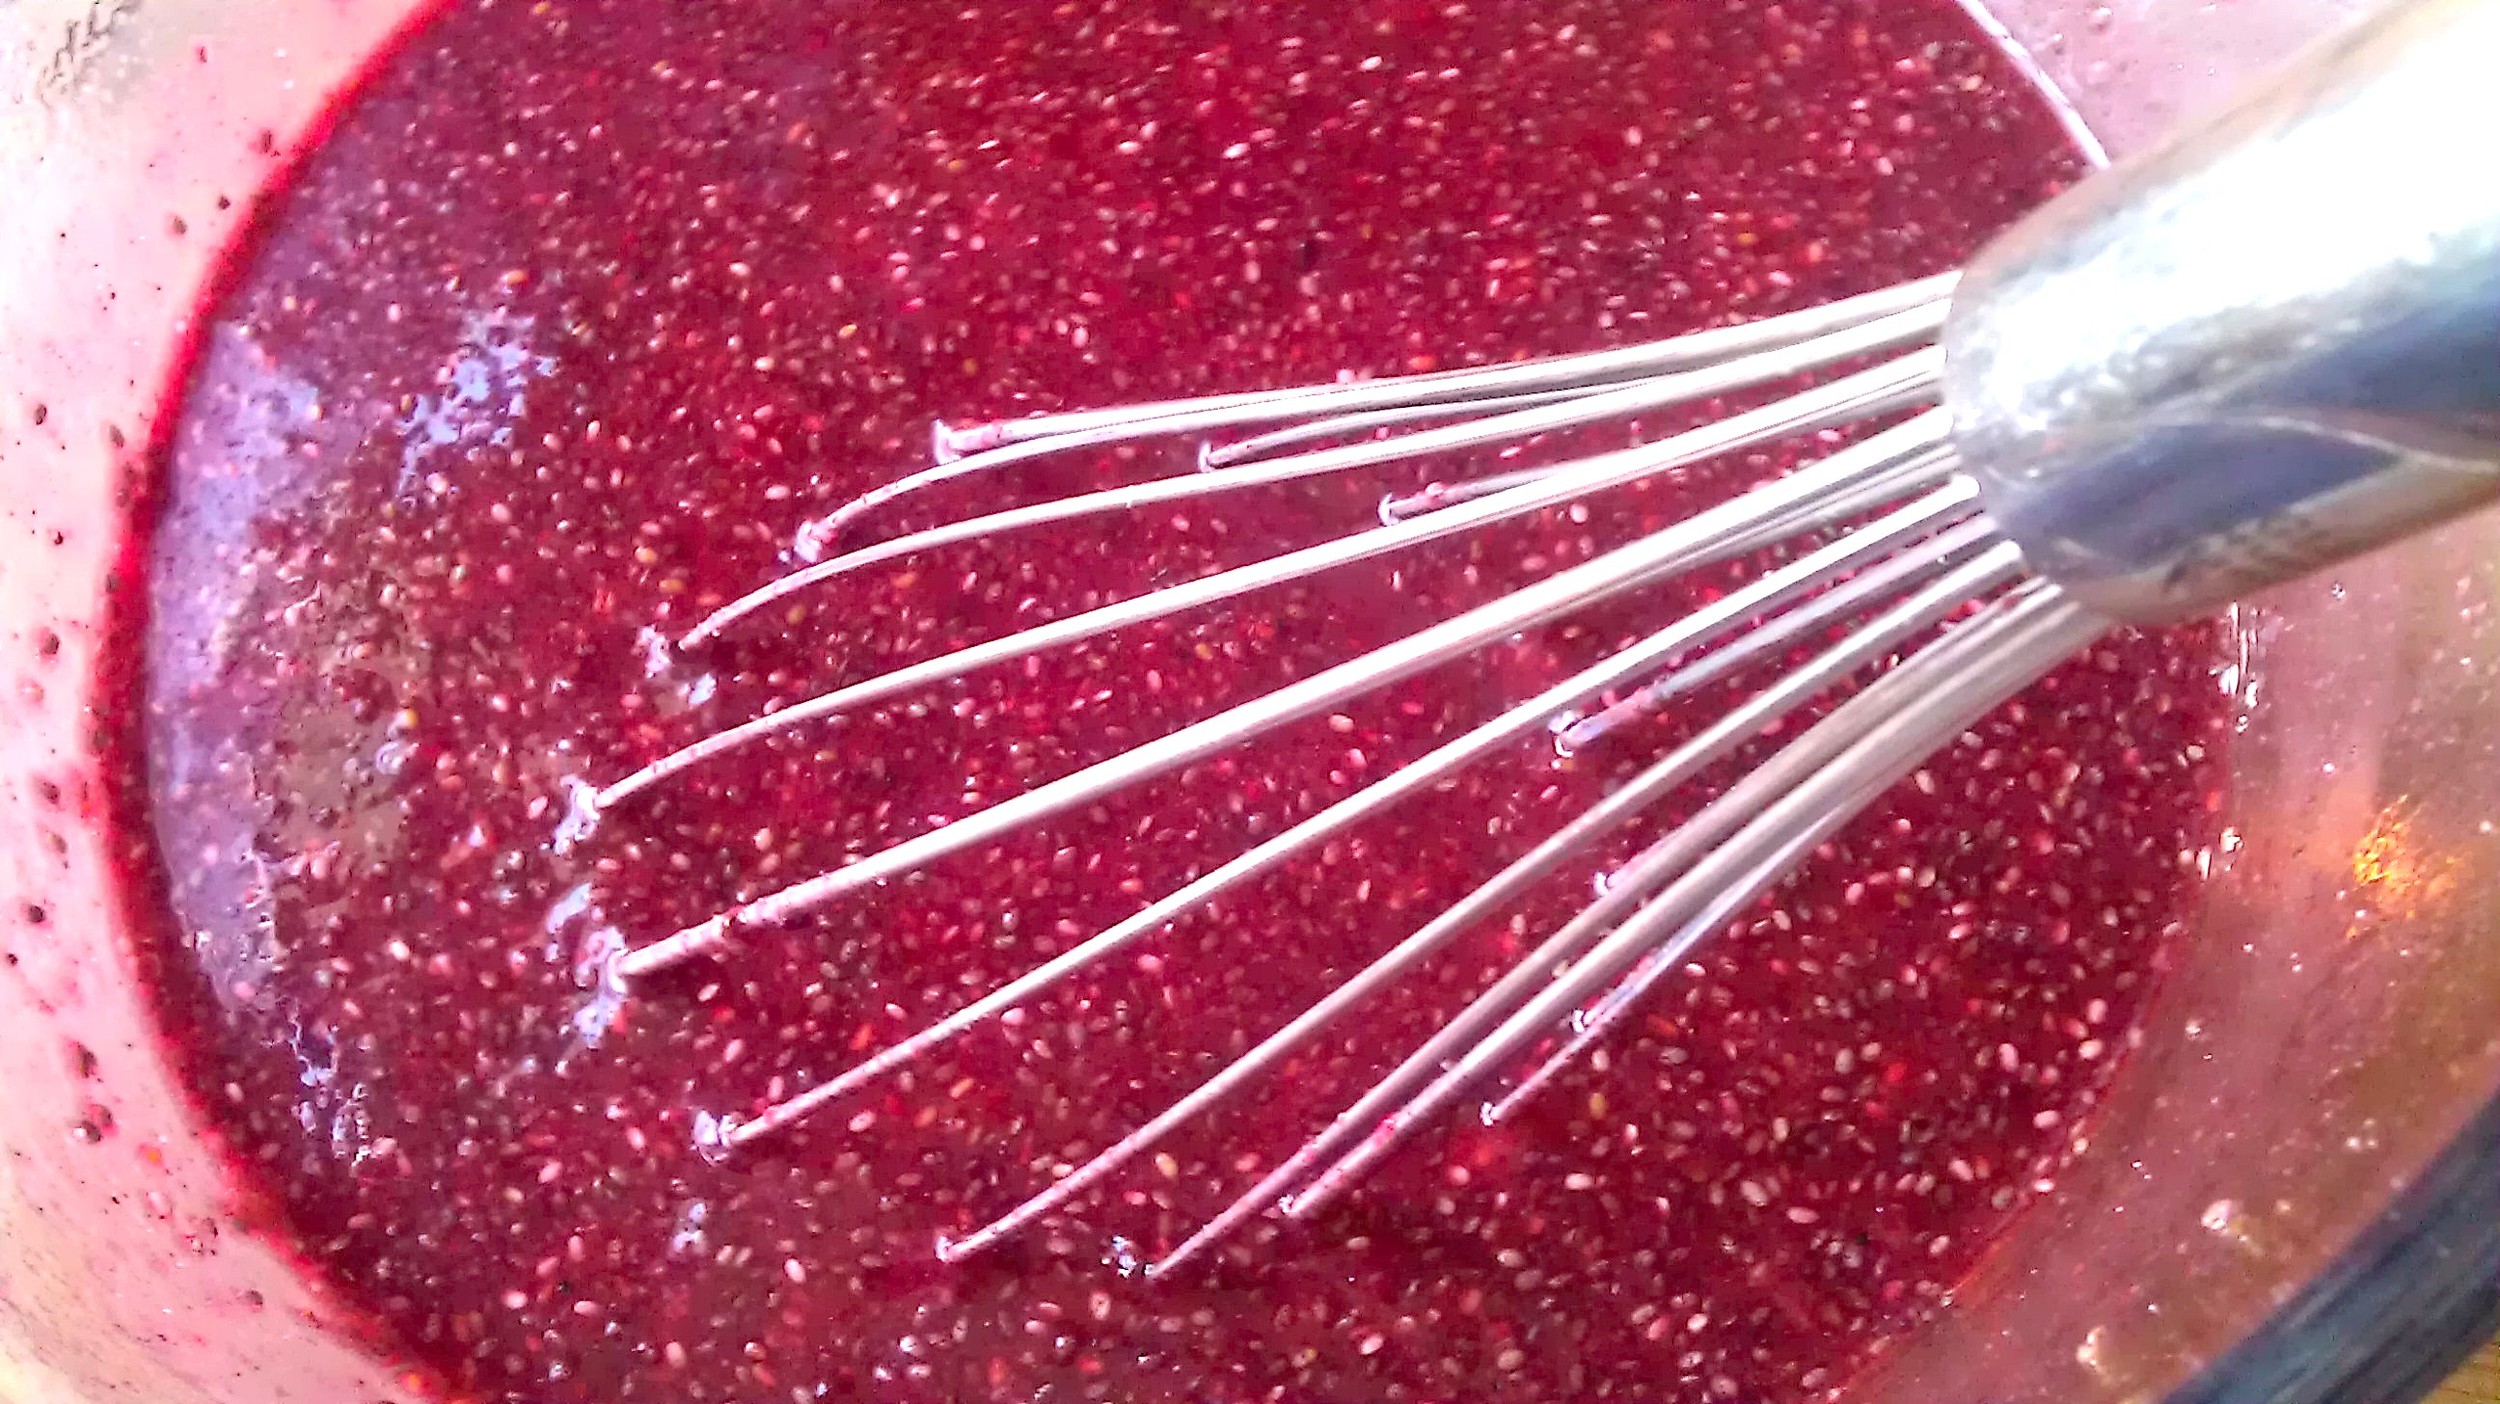
Add everything except the berries into the pomegranate juice. Stir and allow to thicken, about 15 minutes. 

Throw just the frozen berries in the blender and "pulse" a few times to rough cut all the berries.  Fresh berries can simply be muddled with a fork. 

Stir the berries into the Jing Jam mixture. Refrigerate and layer in a glass with coconut whipped cream for an instant superfood trifle. 

Jing Jam
Jing Jam

JingMaster Marshmallows

High in glycine, the anabolic amino acid profile on these babies make them a beauty boosting secret weapon. In fact, the longevity properties of these may go unnoticed as they melt into your JingMaster Haute Chocolate. With no sugar to cause glycation, which lead to wrinkles, these childhood favorites are happily and healthfully back on our campfire sticks. These are an on-the-go go-to, to pop protein in a jiffy.

JingMaster Marshmallows

Gather Up

⅔ cup  (150 ml) water or tea for the pan
⅔ cup  (150 ml) water or tea for the mixing bowl
1 tsp Pearl Powder (optional)
3 TB Great Lakes Grass-Fed Gelatin Powder
1 cup (200g) Xylitol Powder or your favorite honey
⅛ tsp Sea Salt
1 tsp Vanilla Stevia; plus ¼ tsp
⅛ tsp Almond Extract
½ tsp Vanilla Extract
½ cup (65g) Unsweetened Coconut Flakes, fine cut/macaroon cut (for coating)

Jing It Up (option)

Use Spring Dragon Gynostemma Tea instead of water.

Sling It Up

Place ½ cup of the coconut flakes on a parchment lined cookie sheet in a 350°F/177°C degree oven for just a few minutes, until golden. Watch them carefully, they burn quickly! Remove from oven and set aside.

Line an 8x8 inch (20x20cm) square pan with two pieces of parchment paper, crossed over one another, 16x8 inches (40x20cm) each. The excess and overlapping paper will be used to lift the marshmallows out of the pan. Spray lightly with coconut oil and dust with additional xylitol powder and a generous amount of the toasted coconut flakes.

In the bowl of the stand mixer, with the whisk attachment, pour in ⅔ cup of water with ¼ teaspoon of vanilla stevia and then whisk in the powdered gelatin in a slow, steady stream (on low speed) until incorporated. Once fully blended, allow to spin on a low speed, to finish blooming.

Pour the other ⅔ cup of water into a medium heavy bottomed saucepan with xylitol powder, and 1 teaspoon vanilla stevia and salt. Bring to a boil while hand whisking and use a digital heat gun or a candy thermometer to not exceed 240°F/116°C, this will take approximately 10-15 minutes (this is considered "soft ball stage"). Remove immediately from the heat once 240°F/116°C is reached. 
Set the stand mixer speed to medium and slowly pour the hot xylitol mixture into the gelatin mixture. Once the hot xylitol mixture is in the bowl, run the mixer on high, until it expands about three times in volume.

When the marshmallow cream begins to thicken, stop the mixer. The mixture should be a soft meringue cream consistency.  Now beat in the almond and vanilla extract along with the vanilla stevia until combined. Taste for sweetness and add any additional stevia if needed. Whip on high until the sweetener is fully incorporated. 

Immediately pour the marshmallow cream into your parchment lined pan, smoothing with a spatula. You need to be lightening fast in this step, before it sets up! Dust the top of the marshmallows with xylitol powder and toasted coconut flakes. Let it finish setting up uncovered at room temperature for about an hour. 

Lift the marshmallows from the pan by the parchment handles onto a flat surface. With a serrated knife or pizza wheel cut them into squares, or into your desired shapes with cookie cutters. Toss them in a bowl with the remaining toasted coconut and xylitol powder. Store in an airtight container for a few days for up to 2 weeks... ours never make it past a couple of days!

JingMaster Marshmallows

Mojoe JingLato

This is the JingLato version of our "Love You Latte," with a couple of different tweaks. It is a smooth, creamy coffee ice cream and we love having the extra Jing in there of the Tonic Herbs to balance the stimulating effect of the caffeine.  Just like with our “Love You Latte,” we have a number of Jing It Up options for extra adrenal support with the ashwagandha, he shou wu or maca powder, as well as brain and metabolism boosting effects from the MCT oil and added ghee. Add some protein and call this coffee ice cream a full-on meal that can fuel you and your “mojoe” for hours. 

Mojo Jinglato

Gather Up

1 tray (370g) Coffee Ice Cubes
2 TB Cacao Powder
½ TB Sunflower Lecithin Powder
½ cup (120ml) Coconut Milk
¼ tsp Chocolate Stevia
¼ tsp Vanilla Stevia
¼ tsp KAL Hazelnut Stevia

Jing It Up (options)

1 TB Ghee
1 tsp-1 TB MCT Oil
2 tsp Maca Powder
½ tsp Chaga Powder
½ tsp He Shou Wu Powder
½ tsp Ashwagandha Powder
2 TB Whey Protein, Collagen Powder or Vanilla Vegan Protein

Sling It Up

Brew Bulletproof (or your favorite) coffee, let it cool and pour into a Tovolo ice cube trays (about 1¾ cups/430ml). Place in your freezer to freeze solid, about 3-4 hours. Once frozen solid, let your Coffee Ice Cubes sit at room temperature for 10 minutes to slightly soften. Add the coconut milk to your blender, then add your Coffee Ice Cubes and the rest of your ingredients, including your Jing It Up options. Pound with your tamper, until smooth and thick. 

Panacea Panna Cotta

Candy caps elevate mood, help you to relax and help to relieve stress by flipping your giggle switch. With a couple of simple switch-ups, you can make these straight up Vanilla as well. They are sweet, they are jiggly like jello and you can enjoy them for breakfast, lunch, dinner or any time of day for a quick protein snack. These Panna Cottas are made with coconut milk (you can also use organic dairy cream) and gelatin, so they satiate your appetite, build your hair, skin and nails and will amaze all your friends! 

Gather Up

2 cups (500ml) Water
3 TB Great Lakes Gelatin
4 Cups (950ml) Coconut Milk
2 TB Xylitol Powder
1 tsp Vanilla Stevia
½ tsp English Toffee Stevia
¼ tsp KAL Hazelnut Stevia
⅛ tsp Vanilla Bean Powder
½ cup (10g) Dried Candy Cap Mushrooms
2 TB Xylitol Crystals (to coat the Candy Caps)
Saigon Cinnamon (to coat the Candy Caps)

Jing It Up (option)

2 tsp Pearl Powder

Sling It Up

In a large, covered bowl or jar, place the candy cap mushrooms in the coconut milk, and let them sit or a minimum of two hours, although it is best to soak them overnight. 

In a separate glass bowl or wide mouth glass jar, place the water and a half teaspoon of vanilla stevia. Whisk in the gelatin, pouring the powder in a slow steady stream while whisking vigorously to avoid lumps from forming. Set aside for 20 minutes to fully bloom.  

After the mushrooms have steeped, strain the coconut milk into your blender. Set the mushrooms aside in a separate bowl. Add the fully firmed gelatin to your blender and blend until smooth. Add xylitol powder, pearl powder, vanilla bean powder and remaining stevia to taste and blend smooth. Pour the mixture into a large saucepan and bring to simmer over low heat. Pour the warm mixture into silicone molds or tea cups and place into refrigerator to set. 
 
To garnish: Pick out the best-looking candy caps (the smaller the better) that were set aside and roll them in xylitol crystals and dust with cinnamon powder. Garnish the plated Panna Cottas with our Coconut Whipped Cream and one of the crystalized candy caps. 

For Vanilla Panna Cotta, simply omit the candy caps, toffee stevia and hazelnut stevia. Add ⅛ teaspoon of almond extract, an 1/8 tsp Vanilla Bean Powder and additional vanilla stevia to taste. Simmer and pour into molds or cups, chill to set.

PB by Jay

The power of pumpkin seed oil…This is the JingLato that started it all! 

The first time Joy ever laid eyes on Jay, he was just pixels on a computer screen, demonstrating an early version of this recipe live on stage at The LongevityNow® Conference, six years ago. This is Jay’s signature “Peanut Butter” JingLato with no peanuts! Peanut butter was a staple food for Jay growing up, but he ditched it because of aflatoxin issues when he first began studying health and nutrition. Years later when he discovered that the zinc and chlorophyll rich Styrian pumpkin seed oil tastes and smells just like peanut butter, he immediately recreated the favorite ice cream of his youth, only totally Jinged Up! 

Instead of regular peanuts, a Jing It Up option, as pictured, is to top it with lightly toasted jungle peanuts, a clean heirloom variety of the legume. To bring out that classic peanuty flavor, place raw jungle peanuts in a pan on low heat for just a few minutes, shaking the pan, thus rolling the peanuts until lightly toasted and fragrant. 

PB By Jay WEB

Jing It Up (options)

1 TB Maca Powder
½ tsp Astragalus Powder
1 tsp Pearl Powder
¼ cup (38g) Roasted Jungle Peanuts

Gather Up

1 tray (400g) Coconut Ice Cubes
3 TB Lucuma Powder
3 TB Styrian Pumpkin Seed Oil
1 TB Almond Butter
1 TB Xylitol Powder
¾ tsp Toffee Stevia
¼ tsp Sea Salt
2 TB Coconut Milk

Sling It Up 

Take your frozen Coconut Ice Cubes out of the freezer and let them sit on the counter for ten minutes to slightly soften. Pour the Coconut Milk into your blender. Add the softened Coconut Ice Cubes, along with the rest of your ingredients for the JingLato into your blender. Pound with your tamper, until thick and smooth.

Drizzle JingSlinger Chocolate Sauce over the finished Ice Cream and gently fold, to uniformly distribute the Chocolate ribbons. Top with toasted Jungle Peanuts and Coconut Whipped Cream and additional JingSlinger Chocolate Sauce.

SuperFood Salted Caramel

It’s a bird... It’s a plane… It’s SuperFood Salted Caramel! This sauce embodies one of our JingSlinger taste profile principles: It’s even better than the real thing! It is loaded with hormone building beneficial fat, infused with SuperFoods and Tonic Herbs. The brand of the base ingredient is imperative in this formula, it has to be Ancient Organics Ghee for the right buttery, toffee taste, and the Vegan version needs to be the Nutiva SuperFood Shortening. Ice with it, dip in it, spread it... SuperFood Salted Caramel has an infinite number of applications, sweet or savory. We’re even showing you how to flip it into our Salted Caramel Quinoa Crunchies! How do you like them (salted caramel) apples?! 

SuperFood Salted Caramel Spoon

Gather Up

1 cup (225g) Ancient Organics Ghee or Nutiva SuperFood Shortening
⅔ cup (135g) Xylitol Powder, sifted
⅔ cup (85g) Lucuma Powder
2 TB Sunflower Lecithin Powder
2 TB Maca Powder
1½ tsp Toffee Stevia
1 teaspoon Sea Salt
⅛ teaspoon Cinnamon Powder
2 cups (160g) Puffed Quinoa (if making Crunchies)


Jing It Up (options)

1 tsp Astragalus
1 tsp Siberian Ginseng

Sling It Up

Use a double boiler or simply fit a heatproof metal bowl over a medium saucepan containing two inches of water. Bring the water to a simmer, then turn it down to low heat. Melt the ghee/superfood shortening in the metal bowl until it is liquid. Add in your ingredients one by one while stirring continuously. Xylitol powder needs to be put through a sifter to remove any gritty crystals. Add the sea salt last. 

Once fully mixed, transfer to a heatproof container such as a large glass Pyrex liquid measuring cup. (If you are using it right away, to top or stir into a JingLato, it is ready to eat!)

If you are not using it right away, or you are making Salted Caramel Quinoa Crunchies, set a timer and stir briskly with a large fork once every five minutes to ensure that the oil remains incorporated while cooling and does not separate. Do this 3-4 times, over 15-20 minutes. Next, repeat the stirring process two more times, while having it in the refrigerator to cool more rapidly for 10 additional minutes. Once completely cooled, transfer to an airtight glass container. It can be stored at room temperature and will last several weeks. 
To make Salted Caramel Quinoa Crunchies, you want the mixture to be a little warm, and the consistency to be easy to stir. Depending on the temperature in your kitchen, this should occur after the initial 15-20 minute cooling period, and may need
5 minutes in the refrigerator to thicken a bit.

If your Pyrex container is large enough, simply pour the Puffed Quinoa into the Salted Caramel Sauce and stir the mixture very well, making sure the Puffed Quinoa is evenly incorporated. 

Fill your favorite mini silicon molds. Put them in the freezer to set and in about one hour, you will have Salted Caramel Quinoa Crunchies! They can be stored in either the refrigerator or in the freezer. They can be eaten straight out of cold storage, or left at room temperature for 5 minutes to soften just before eating.

SuperFood Salted Caramel

Whipped Cream 101

Lauric, capric and caprylic fatty acids never tasted so good! Heart healthy, brain boosting and fat burning, Whipped Cream is back on the menu! You can create this Coconut Whipped Cream in a stand mixer, with an electric hand mixer or an immersion blender. Creating flavored Whipped Creams becomes limitless with flavored liquid stevia, organic extracts, essential oils, powderized freeze-dried fruit and herbs… and don’t forget cacao powder, Chocolate Whipped Cream is a heavenly ketogenic treat! Want a Raspberry Cream? Simply whirl the freeze dried fruit in your clean spice or coffee grinder until it is a fine powder, stop the mixer and sift the powder into the cream in the last few minutes of whipping, then continue whipping until fully incorporated. Chef Note - All powders should be sifted to create a smooth flavored Whipped Cream.

Whipped Cream 101

Gather Up

2 cups (500ml) Coconut Cream (from 2 cans of Coconut Milk, chilled in refrigerator overnight)
½ tsp Vanilla Stevia
½ tsp Pearl Powder (optional)

Jing It Up (Choose One)

2-3 TB powderized/sifted freeze dried Fruit of choice  
2-3 TB Cacao Powder, sifted
1 TB Arnox Advantage

For Wildberry Cream - 1 tsp Miracle Reds, 2 TB Raspberry Powder, with 1 TB Blueberry Powder

Sling It Up   

Without shaking the cans of chilled coconut milk, carefully open them, and scoop out just the coconut cream, collected from the top of the can. Save the remaining coconut water for future recipes or to thin your coconut cream while whisking, if needed.

With the whisk attached, place coconut cream into the bowl of your stand mixer. Beat on high speed. Add the vanilla stevia, pearl powder and any additional flavors or powder you wish to infuse (a teaspoon at a time) after about 3 minutes, by stopping the mixer, scraping down the sides and adding additional sweetener to balance the powders you have chosen. It is ready once the coconut cream has expanded in volume, and makes “stiff peaks.”

If the coconut cream has not increased in volume after about 4 minutes of whisking, then add 1 teaspoon at a time of the remaining coconut water to get a lighter consistency that will whip up and expand. However, know that too much coconut water will make it too thin and no “Whip Cream” will form. 

Transfer to a piping bag, or store in an airtight container in the refrigerator for up to a week.