Jing Jam

Jing Jam

Gather Up

3 cups (750ml) Pomegranate Juice
½ cup (80g) Chia Seeds
1½ cups (345g) Raspberries (frozen or fresh)
1-2 TB Xylitol (to taste)
½ tsp Vanilla Stevia

Jing It Up (options)

1 tsp Freeze-Dried Acai Powder
1 tsp Freeze-Dried Maqui Powder
2 tsp Miracle Reds Powder
2 tsp Arnox Advantage

Sling It Up

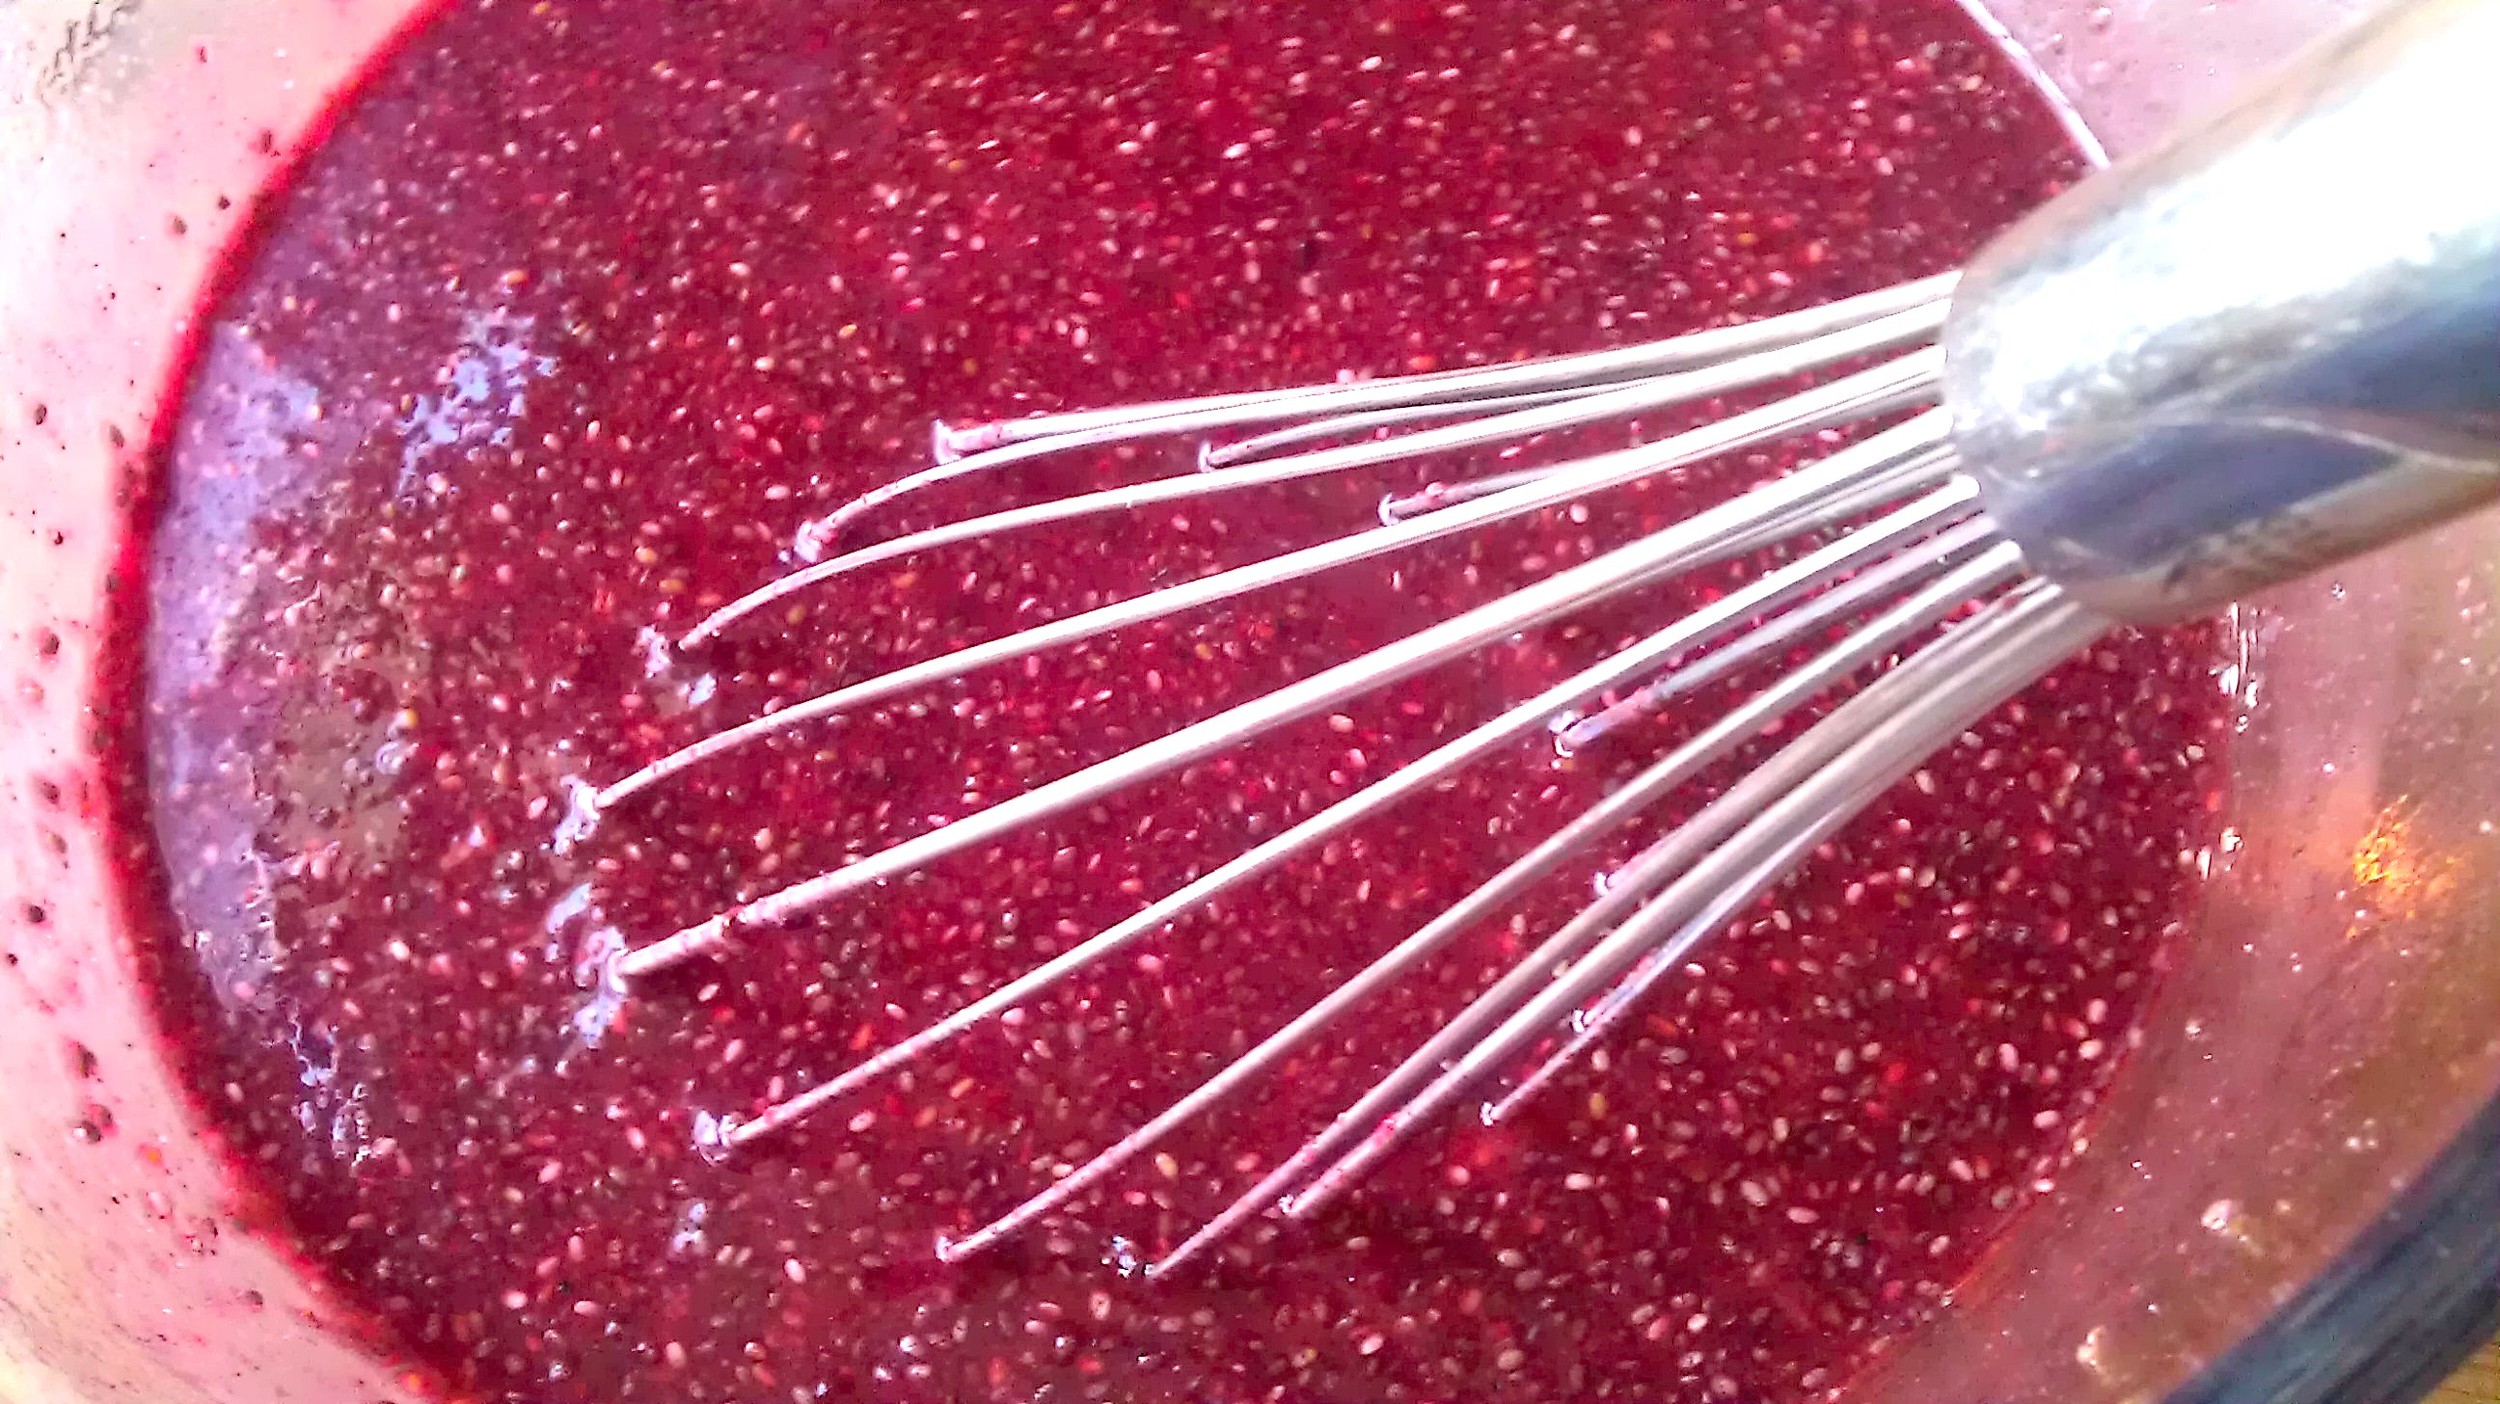
Add everything except the berries into the pomegranate juice. Stir and allow to thicken, about 15 minutes. 

Throw just the frozen berries in the blender and "pulse" a few times to rough cut all the berries.  Fresh berries can simply be muddled with a fork. 

Stir the berries into the Jing Jam mixture. Refrigerate and layer in a glass with coconut whipped cream for an instant superfood trifle. 

Jing Jam
Jing Jam

JingSmacked Kitchari

In the United States today, juice fasting is one of the most popular forms of detoxification, but in Ayurveda, they use Kitchari, which is both cleansing and rejuvenating. Kitchari is a combination of white basmati rice and split yellow mung beans. Both of these foods are specifically good for each of the Ayurvedic Dosha (body) types. It is very easy to digest and is often given as the first food for infants as well as for people who are healing in the hospital. It can be made and enjoyed as a solo meal, or eaten as every meal for days or weeks at a time. This latter application gives rest to the digestive system and allows the body to detoxify. 

We love to supercharge our Kitchari with tasty Jinged-Up SuperFoods! Astragalus for immunity and upright Qi force, mucuna for brain enhancement and a natural dopamine boost, and SugaVida for broad spectrum B Vitamin nutrition and amazing flavor.

People who have weak digestion can change the ratio of rice to beans to 2:1 or even 3:1, in favor of more rice. Split yellow mung beans are also sold as "dahl beans." Kitchari will last well in the refrigerator for 3-4 days. Reheat on a stove top or in your oven.

Jingsmacked Kitchari

Jing It Up (options)

1 TB Mucuna
1 TB Sugavida
1 TB Astragalus

Gather Up

1 cup (225g) dried White Basmati Rice
1 cup (225g) dried Split Yellow Mung Beans
8 cups (2000ml) Water
2 tsp Yellow Curry Powder
1 tsp Cumin Powder
½ tsp Garlic Powder
¼ Black Pepper Powder
¼ tsp Cardamon Powder
½ tsp Sea Salt
½ tsp Cinnamon Powder
1 Whole Carrot, grated
1 cup fresh greens, Spinach, Kale, etc
½ cup fresh Onion, diced
4 TB Ghee or SuperFood Shortening

Sling It Up

Pour the split yellow mung beans onto a baking sheet or flat surface and pick out any stray little stones.  Soak the white basmati rice and split yellow mung beans together in a bowl, covered with at least an inch of water. Let them soak for a few hours, or even overnight. If you are in more of a hurry, you can boil the water, and soak them in the boiled water for an hour. In every case, discard the soak water. In a separate pot on the stove, bring your 8 cups of water to a boil, then add the rice, beans, powdered spices and ghee (or SuperFood Shortening). Let it cook on a gentle boil for about 10 minutes, then bring it down to a simmer for another 15-25 minutes. Midway through the simmering process, add your fresh vegetable ingredients. If it is starting to stick on the bottom of the pan, add another ½ - 1 cup of water and reduce the heat. The final texture of your Kitchari will be soft, like a very soft porridge. You can customize the texture of the fresh vegetables however you prefer them, cook them more if you want them soft, cook them less if you want to have a little crunch left in them. 

Jingsmacked Kitchari

JingMaster Marshmallows

High in glycine, the anabolic amino acid profile on these babies make them a beauty boosting secret weapon. In fact, the longevity properties of these may go unnoticed as they melt into your JingMaster Haute Chocolate. With no sugar to cause glycation, which lead to wrinkles, these childhood favorites are happily and healthfully back on our campfire sticks. These are an on-the-go go-to, to pop protein in a jiffy.

JingMaster Marshmallows

Gather Up

⅔ cup  (150 ml) water or tea for the pan
⅔ cup  (150 ml) water or tea for the mixing bowl
1 tsp Pearl Powder (optional)
3 TB Great Lakes Grass-Fed Gelatin Powder
1 cup (200g) Xylitol Powder or your favorite honey
⅛ tsp Sea Salt
1 tsp Vanilla Stevia; plus ¼ tsp
⅛ tsp Almond Extract
½ tsp Vanilla Extract
½ cup (65g) Unsweetened Coconut Flakes, fine cut/macaroon cut (for coating)

Jing It Up (option)

Use Spring Dragon Gynostemma Tea instead of water.

Sling It Up

Place ½ cup of the coconut flakes on a parchment lined cookie sheet in a 350°F/177°C degree oven for just a few minutes, until golden. Watch them carefully, they burn quickly! Remove from oven and set aside.

Line an 8x8 inch (20x20cm) square pan with two pieces of parchment paper, crossed over one another, 16x8 inches (40x20cm) each. The excess and overlapping paper will be used to lift the marshmallows out of the pan. Spray lightly with coconut oil and dust with additional xylitol powder and a generous amount of the toasted coconut flakes.

In the bowl of the stand mixer, with the whisk attachment, pour in ⅔ cup of water with ¼ teaspoon of vanilla stevia and then whisk in the powdered gelatin in a slow, steady stream (on low speed) until incorporated. Once fully blended, allow to spin on a low speed, to finish blooming.

Pour the other ⅔ cup of water into a medium heavy bottomed saucepan with xylitol powder, and 1 teaspoon vanilla stevia and salt. Bring to a boil while hand whisking and use a digital heat gun or a candy thermometer to not exceed 240°F/116°C, this will take approximately 10-15 minutes (this is considered "soft ball stage"). Remove immediately from the heat once 240°F/116°C is reached. 
Set the stand mixer speed to medium and slowly pour the hot xylitol mixture into the gelatin mixture. Once the hot xylitol mixture is in the bowl, run the mixer on high, until it expands about three times in volume.

When the marshmallow cream begins to thicken, stop the mixer. The mixture should be a soft meringue cream consistency.  Now beat in the almond and vanilla extract along with the vanilla stevia until combined. Taste for sweetness and add any additional stevia if needed. Whip on high until the sweetener is fully incorporated. 

Immediately pour the marshmallow cream into your parchment lined pan, smoothing with a spatula. You need to be lightening fast in this step, before it sets up! Dust the top of the marshmallows with xylitol powder and toasted coconut flakes. Let it finish setting up uncovered at room temperature for about an hour. 

Lift the marshmallows from the pan by the parchment handles onto a flat surface. With a serrated knife or pizza wheel cut them into squares, or into your desired shapes with cookie cutters. Toss them in a bowl with the remaining toasted coconut and xylitol powder. Store in an airtight container for a few days for up to 2 weeks... ours never make it past a couple of days!

JingMaster Marshmallows

Mojoe JingLato

This is the JingLato version of our "Love You Latte," with a couple of different tweaks. It is a smooth, creamy coffee ice cream and we love having the extra Jing in there of the Tonic Herbs to balance the stimulating effect of the caffeine.  Just like with our “Love You Latte,” we have a number of Jing It Up options for extra adrenal support with the ashwagandha, he shou wu or maca powder, as well as brain and metabolism boosting effects from the MCT oil and added ghee. Add some protein and call this coffee ice cream a full-on meal that can fuel you and your “mojoe” for hours. 

Mojo Jinglato

Gather Up

1 tray (370g) Coffee Ice Cubes
2 TB Cacao Powder
½ TB Sunflower Lecithin Powder
½ cup (120ml) Coconut Milk
¼ tsp Chocolate Stevia
¼ tsp Vanilla Stevia
¼ tsp KAL Hazelnut Stevia

Jing It Up (options)

1 TB Ghee
1 tsp-1 TB MCT Oil
2 tsp Maca Powder
½ tsp Chaga Powder
½ tsp He Shou Wu Powder
½ tsp Ashwagandha Powder
2 TB Whey Protein, Collagen Powder or Vanilla Vegan Protein

Sling It Up

Brew Bulletproof (or your favorite) coffee, let it cool and pour into a Tovolo ice cube trays (about 1¾ cups/430ml). Place in your freezer to freeze solid, about 3-4 hours. Once frozen solid, let your Coffee Ice Cubes sit at room temperature for 10 minutes to slightly soften. Add the coconut milk to your blender, then add your Coffee Ice Cubes and the rest of your ingredients, including your Jing It Up options. Pound with your tamper, until smooth and thick. 

Living Waters Margarita

Jay creating a Living Waters Margarita
Pouring a Living Waters Margarita

Inspired by one of the original drinks from the Erewhon Tonic Bar, this is a live probiotic, hydrating and alkalizing drink that is our go-to for recovery whenever we are arrive back home after flying and traveling. It is also a great thing to reach for after a hard workout! 

This recipe will make enough for 2-4 people, however, even if you are enjoying it by yourself, know that it will keep well in the refrigerator for at least 3-4 days. If you are purchasing coconut water kefir, it will usually be packaged in a 16 ounce bottle, so to save time and money, we based the proportions around one full bottle. Because this is a live fermentation, be sure to seal it in a jar or container with an airtight lid. Remember... Your margarita is alive! Pressure can build up in the bottle, so open it carefully over your sink. Always open coconut water kefir bottles the same way! 

Gather Up

3 cups (420g) Ice
1½ cups (370ml) Water
2 cups (250ml) Coconut Water Kefir
½ cup (120ml) Lemon Juice
1 TB Lemon Rind
2 tsp Fresh Grated Ginger or 1 TB Ginger Juice
½ cup (120ml) Coconut Milk
1 TB Styrian Pumpkin Seed Oil
¼  tsp Vanilla Stevia (or more to taste)
¼  tsp Sea Salt 

Jing It Up (options)

½ tsp ChlorOxygen
¼ cup (60ml) Aloe Juice/ fresh Aloe Gel
¼ cup (30g) Vanilla Whey Protein or Vegan Protein
¼ cup (30g) Collagen Powder
2 tsp Pearl Powder

Sling It Up

Toss all ingredients into a high performance blender and blend well. Know that this drink will expand, so do not overfill your blender. Better to blend in batches, in equal halves. 

Living Waters Margaritas

Silken Kabocha Bisque

Soup has always been a favorite comfort food, especially when there is a chill in the air. A cup of soup warms your hands and your heart. These soups have both flavor and function. Kabocha contains naturally occurring beneficial pectins, which are polysaccharides that have been shown to have anti-inflammatory and even blood sugar balancing properties. This SuperHero Squash is known around the world for its aphrodisiac effects, however, a chic cheat for this recipe is to swap out the two cups of fresh Kabocha for two cups of frozen butternut squash.

Silken Kabocha Bisque

Sling It Up

Pre-heat oven 365°F/185. Cut the squash in half. Remove the seeds and then sprinkle the flesh with black pepper, black truffle salt and garlic granules. Bake it (flesh down, skin on) on a parchment lined sheet pan until fork tender, about 30-45 minutes.

While it is baking, sauté the onion with the coconut oil and a pinch of truffle salt and black pepper in the bottom of a soup pot (which will ultimately hold the whole soup) until fork tender/translucent. 
Once cooked, transfer to your blender/food processor. A high performance blender works best.  

Once the squash is cooked, scoop the flesh from the skin. Add the two packed cups of squash to your blender and one cup of the water along with the coconut milk, rosemary and spices. Save the half-cup of water to use for smoother blending, if needed. When using a blender, put a towel over the vented lid and blend at a low speed, gradually increasing the speed. Blend on a medium setting until smooth. Add additional salt and pepper to taste.

Pour the contents back into the soup pot to warm. Thin with additional coconut milk and water if a thinner consistency is desired. 

(optional) Serve with a swirl of pumpkin seed oil and coconut milk on top, and garnish with whole shelled, spiced pumpkin seeds (sold in bags at Whole Foods) and a sprinkle of truffle salt. 

Yields about six, one cup (250ml each) servings.

Gather Up

1 TB Coconut Oil
½ cup (75g) Onion, diced
2 cups (500g) Kabocha Squash, baked
1½ cup (375ml) Water
2 cups (500ml) Coconut Milk
2 tsp (packed) Fresh Rosemary, chopped
(leaves, no stems)
1 tsp Black Truffle Salt or Sea Salt
1 tsp Black Pepper
1 tsp Garlic Granules
Spiced, Shelled Pumpkin Seeds (optional garnish)
Styrian Pumpkin Seed Oil (optional garnish)

Jing It Up (options)

1 TB Ghee
1 tsp Chaga Powder
1 tsp Maca Powder
2 tsp Pearl Powder
2 TB Collagen Powder

Silken Kabocha Bisque Meal

Panacea Panna Cotta

Candy caps elevate mood, help you to relax and help to relieve stress by flipping your giggle switch. With a couple of simple switch-ups, you can make these straight up Vanilla as well. They are sweet, they are jiggly like jello and you can enjoy them for breakfast, lunch, dinner or any time of day for a quick protein snack. These Panna Cottas are made with coconut milk (you can also use organic dairy cream) and gelatin, so they satiate your appetite, build your hair, skin and nails and will amaze all your friends! 

Gather Up

2 cups (500ml) Water
3 TB Great Lakes Gelatin
4 Cups (950ml) Coconut Milk
2 TB Xylitol Powder
1 tsp Vanilla Stevia
½ tsp English Toffee Stevia
¼ tsp KAL Hazelnut Stevia
⅛ tsp Vanilla Bean Powder
½ cup (10g) Dried Candy Cap Mushrooms
2 TB Xylitol Crystals (to coat the Candy Caps)
Saigon Cinnamon (to coat the Candy Caps)

Jing It Up (option)

2 tsp Pearl Powder

Sling It Up

In a large, covered bowl or jar, place the candy cap mushrooms in the coconut milk, and let them sit or a minimum of two hours, although it is best to soak them overnight. 

In a separate glass bowl or wide mouth glass jar, place the water and a half teaspoon of vanilla stevia. Whisk in the gelatin, pouring the powder in a slow steady stream while whisking vigorously to avoid lumps from forming. Set aside for 20 minutes to fully bloom.  

After the mushrooms have steeped, strain the coconut milk into your blender. Set the mushrooms aside in a separate bowl. Add the fully firmed gelatin to your blender and blend until smooth. Add xylitol powder, pearl powder, vanilla bean powder and remaining stevia to taste and blend smooth. Pour the mixture into a large saucepan and bring to simmer over low heat. Pour the warm mixture into silicone molds or tea cups and place into refrigerator to set. 
 
To garnish: Pick out the best-looking candy caps (the smaller the better) that were set aside and roll them in xylitol crystals and dust with cinnamon powder. Garnish the plated Panna Cottas with our Coconut Whipped Cream and one of the crystalized candy caps. 

For Vanilla Panna Cotta, simply omit the candy caps, toffee stevia and hazelnut stevia. Add ⅛ teaspoon of almond extract, an 1/8 tsp Vanilla Bean Powder and additional vanilla stevia to taste. Simmer and pour into molds or cups, chill to set.

PB by Jay

The power of pumpkin seed oil…This is the JingLato that started it all! 

The first time Joy ever laid eyes on Jay, he was just pixels on a computer screen, demonstrating an early version of this recipe live on stage at The LongevityNow® Conference, six years ago. This is Jay’s signature “Peanut Butter” JingLato with no peanuts! Peanut butter was a staple food for Jay growing up, but he ditched it because of aflatoxin issues when he first began studying health and nutrition. Years later when he discovered that the zinc and chlorophyll rich Styrian pumpkin seed oil tastes and smells just like peanut butter, he immediately recreated the favorite ice cream of his youth, only totally Jinged Up! 

Instead of regular peanuts, a Jing It Up option, as pictured, is to top it with lightly toasted jungle peanuts, a clean heirloom variety of the legume. To bring out that classic peanuty flavor, place raw jungle peanuts in a pan on low heat for just a few minutes, shaking the pan, thus rolling the peanuts until lightly toasted and fragrant. 

PB By Jay WEB

Jing It Up (options)

1 TB Maca Powder
½ tsp Astragalus Powder
1 tsp Pearl Powder
¼ cup (38g) Roasted Jungle Peanuts

Gather Up

1 tray (400g) Coconut Ice Cubes
3 TB Lucuma Powder
3 TB Styrian Pumpkin Seed Oil
1 TB Almond Butter
1 TB Xylitol Powder
¾ tsp Toffee Stevia
¼ tsp Sea Salt
2 TB Coconut Milk

Sling It Up 

Take your frozen Coconut Ice Cubes out of the freezer and let them sit on the counter for ten minutes to slightly soften. Pour the Coconut Milk into your blender. Add the softened Coconut Ice Cubes, along with the rest of your ingredients for the JingLato into your blender. Pound with your tamper, until thick and smooth.

Drizzle JingSlinger Chocolate Sauce over the finished Ice Cream and gently fold, to uniformly distribute the Chocolate ribbons. Top with toasted Jungle Peanuts and Coconut Whipped Cream and additional JingSlinger Chocolate Sauce.

Miso Yin Soup

Yin is the energetic principle of rest, repair, recovery and rejuvenation. This SuperFood Blender Soup is perfect for winding down at the end of your day and preparing you for the most Yin thing you do... sleep.  Kelp is an amazing Yin food. We pair kelp granules from the company Maine Coast in this recipe with several other nutritives and tonic herbs that enhance relaxation to help you fall asleep, and provide the nourishment for a deep, rejuvenative sleep. 

The organic, non-GMO, 2-3 year fermented “Hacho Miso” from Eden Foods is the only appearance of soybean in any form in this book. This miso is a nutritious, probiotic, grounding food, which is fermented in a 650-year old traditional manner using bamboo barrels.

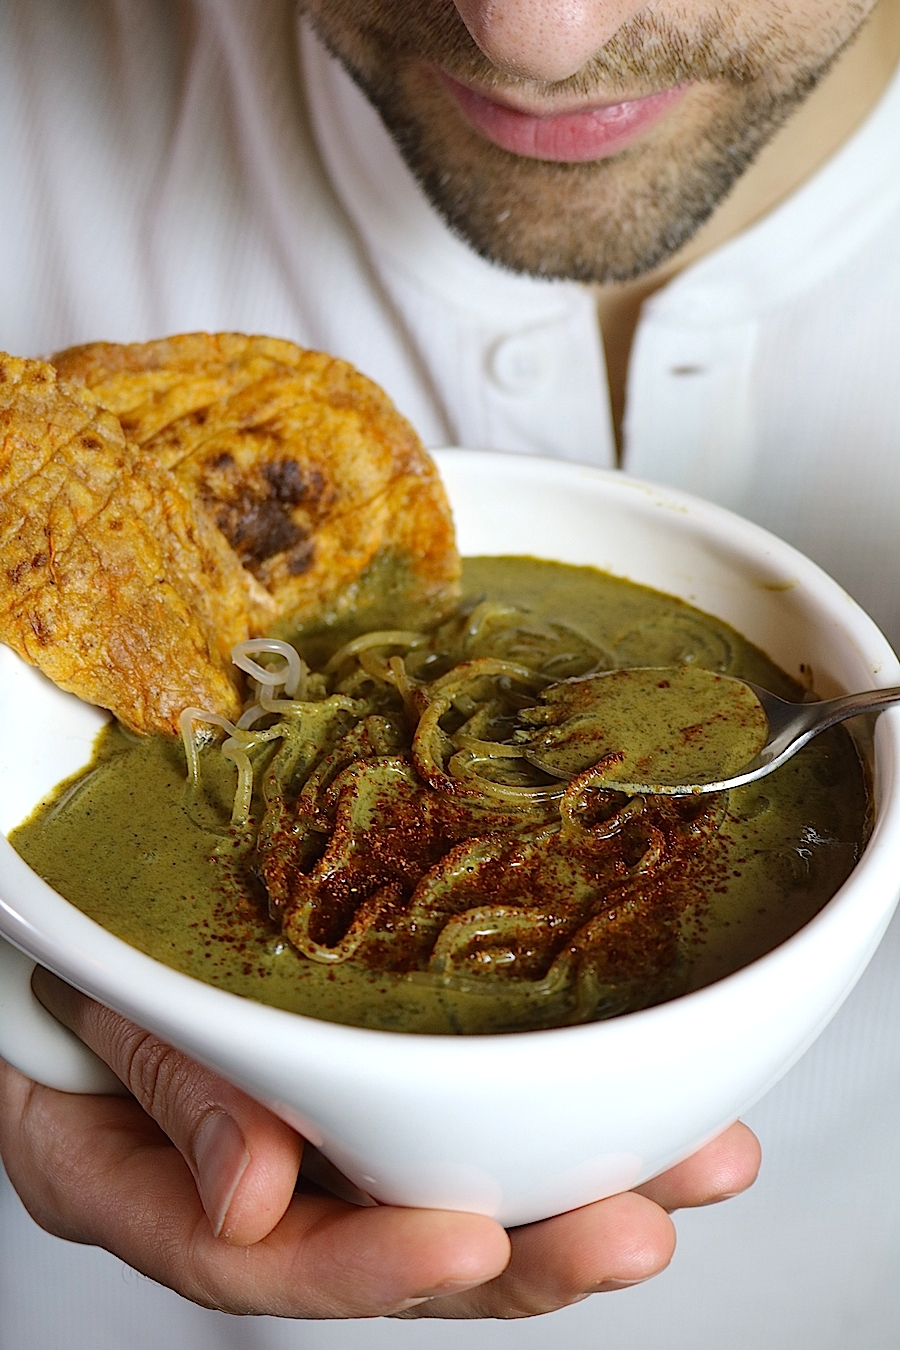
SugaVida takes the flavor of this soup through the roof, while its array of B Vitamins provide the building blocks for a deep night’s sleep. Our favorite Ionic Magnesium, from Mineralife, is an amazing Jing It Up option. Magnesium before bed helps you sleep like a rock, and will help with testosterone production in the morning, especially for men. Add collagen protein, Sea Tangle Kelp Noodles, Miracle Noodles, or our Sweet Potato Naan (pictured left, see page 192) if you wish to make this soup even more hearty. 

Miso Yin Soup

Pictured with Sweet Potato Naan

Gather Up

1½ cup (370ml) Water
½ cup (120ml) Coconut Milk
2 TB Kelp Granules
1 TB Hacho Miso
1 TB Black Sesame Seed
1 tsp Yellow Curry Powder½ tsp Fajita Powder
2 tsp Lemon Juice
1 TB Ghee/ SuperFood Shortening
1 tsp Pearl Powder
2 tsp SugaVida
Sea Tangle Kelp Noodles (optional)

Jing It Up (options)

½ tsp Restore the Shen
½ tsp Mucuna
1 TB Collagen
1 tsp Mineralife Ionic Magnesium

Sling It Up

Place kelp noodles in hot water or hot gynostemma tea to hydrate and soften. Drain before adding into the soup.

Add the water and coconut milk to a small pan on the stove and bring it to a simmer.  Add all of your additional ingredients (except for the optional noodles) into your blender. Add your hot liquid to your blender, put your blender lid on and cover the lid with a towel. Hold the lid down, as you turn the blender on the lowest setting, before cranking up to high. Blend on high for 45-60 seconds. 

SuperFood Salted Caramel

It’s a bird... It’s a plane… It’s SuperFood Salted Caramel! This sauce embodies one of our JingSlinger taste profile principles: It’s even better than the real thing! It is loaded with hormone building beneficial fat, infused with SuperFoods and Tonic Herbs. The brand of the base ingredient is imperative in this formula, it has to be Ancient Organics Ghee for the right buttery, toffee taste, and the Vegan version needs to be the Nutiva SuperFood Shortening. Ice with it, dip in it, spread it... SuperFood Salted Caramel has an infinite number of applications, sweet or savory. We’re even showing you how to flip it into our Salted Caramel Quinoa Crunchies! How do you like them (salted caramel) apples?! 

SuperFood Salted Caramel Spoon

Gather Up

1 cup (225g) Ancient Organics Ghee or Nutiva SuperFood Shortening
⅔ cup (135g) Xylitol Powder, sifted
⅔ cup (85g) Lucuma Powder
2 TB Sunflower Lecithin Powder
2 TB Maca Powder
1½ tsp Toffee Stevia
1 teaspoon Sea Salt
⅛ teaspoon Cinnamon Powder
2 cups (160g) Puffed Quinoa (if making Crunchies)


Jing It Up (options)

1 tsp Astragalus
1 tsp Siberian Ginseng

Sling It Up

Use a double boiler or simply fit a heatproof metal bowl over a medium saucepan containing two inches of water. Bring the water to a simmer, then turn it down to low heat. Melt the ghee/superfood shortening in the metal bowl until it is liquid. Add in your ingredients one by one while stirring continuously. Xylitol powder needs to be put through a sifter to remove any gritty crystals. Add the sea salt last. 

Once fully mixed, transfer to a heatproof container such as a large glass Pyrex liquid measuring cup. (If you are using it right away, to top or stir into a JingLato, it is ready to eat!)

If you are not using it right away, or you are making Salted Caramel Quinoa Crunchies, set a timer and stir briskly with a large fork once every five minutes to ensure that the oil remains incorporated while cooling and does not separate. Do this 3-4 times, over 15-20 minutes. Next, repeat the stirring process two more times, while having it in the refrigerator to cool more rapidly for 10 additional minutes. Once completely cooled, transfer to an airtight glass container. It can be stored at room temperature and will last several weeks. 
To make Salted Caramel Quinoa Crunchies, you want the mixture to be a little warm, and the consistency to be easy to stir. Depending on the temperature in your kitchen, this should occur after the initial 15-20 minute cooling period, and may need
5 minutes in the refrigerator to thicken a bit.

If your Pyrex container is large enough, simply pour the Puffed Quinoa into the Salted Caramel Sauce and stir the mixture very well, making sure the Puffed Quinoa is evenly incorporated. 

Fill your favorite mini silicon molds. Put them in the freezer to set and in about one hour, you will have Salted Caramel Quinoa Crunchies! They can be stored in either the refrigerator or in the freezer. They can be eaten straight out of cold storage, or left at room temperature for 5 minutes to soften just before eating.

SuperFood Salted Caramel

Maca Chocolate Pancakes

Pancakes are all about lazy weekend mornings and breakfast in bed! This is a chocoholic’s wish come true! Chaga powder will bolster your immunity and you can Jing Up your hormones with the maca powder. Bring them to a whole ‘nother level by adding “I Love You Berry Much” Strawberry JingLato between each layer and topping with Coconut Whipped Cream as pictured below.

These pancakes flip easily from Paleo to Vegan. If you are making the Vegan version, the swap is simple. It is important to use the fine ground almond flour from Honeyville, otherwise the pancakes can be a little bit grainy. 

Maca Chocolate Pancakes

Jing It Up (paleo or vegan)

2 tsp Maca Powder
1 tsp MCT Oil
1 tsp Chaga Powder or
Restore the Jing 

Gather Up (paleo)

2½ cups (315g) fine ground blanched Almond Flour
½ cup (65g) of Otto’s Cassava Flour
¼ tsp Baking Soda
¼ tsp Baking Powder
⅛ tsp Sea Salt
3 TB Cacao Powder
3 TB Xylitol Powder, to taste
6 large Eggs
¾ cup (180ml) Coconut Milk
1 tsp Lemon Juice
½ tsp Vanilla Stevia
½ tsp Chocolate Stevia
¼ cup (60ml) Water
¼ cup (46g) Lily’s Sugar Free Chocolate Chips
Ghee, SuperFood Shortening or Coconut Oil for pan cooking


Sling It Up (paleo)

In a medium bowl, sift and/or mix together the dry ingredients and then add the chocolate chips. In a separate bowl, or in your blender, blend together the water, eggs, lemon juice, coconut milk, stevia and vanilla extract until creamed and frothy. Add the liquid ingredients to the dry ingredients and mix well. Let it meld for a few minutes. The gluten-free flours are very thirsty flours and by allowing them to soak up moisture you get a better pancake.

Heat your skillet over medium to low heat with a heaping tablespoon of coconut oil, ghee, or SuperFood Shortening. Add about 2 tablespoons of pancake batter to the pan, we use an ice cream scoop and smooth them with a spoon so they are not dome shaped. If you have trouble flipping the pancakes, try making them smaller about 3-4 inches wide. A wide, super-thin blade on the spatula is the secret to flipping these successfully.

Cook the pancake until it starts to bubble and the edges just start to brown up then you can flip. These cook quickly! Flip carefully. You can keep the pancakes in a warm oven until ready to serve. We like to make them ahead of time, freeze them and put them in the oven on a parchment lined sheet pan to reheat.

Sling It Up (vegan)

All the ingredients and blending instructions remain the same except you will delete the eggs/ghee and increase the coconut milk to 1½ cups, the water to ½ cup and add in ¼ cup melted coconut oil into the wet ingredients when blending. These will be spooned onto a parchment lined sheet pan, smoothed into the pancake size and thickness you want. Bake in the oven at 375°F/191°C for about 25 minutes. They should puff up a bit and be firm to the touch when finished. Bonus! They all can be done at the same time. They are too delicate to cook in a skillet but come out perfect on parchment.

Sleeping BeauTea

Want to biohack your sleep? Combining nutraceuticals, minerals and Chinese & Ayurvedic Tonic Herbs, this is our ultimate herbal sleep tea! 

Awaken the Shen is calming and heart opening, while pearl powder is soothing and grounding. L-theanine is a GABA precursor, your neurotransmitter for relaxation. Ashwagandha can help to regulate sleep patterns, and also influences GABA pathways.  Bupleurum & Dragon Bone is a Vegan option to replace the pearl powder, it is a classic Chinese herbal formula that helps to relieve stress by relieving liver stagnation and is also used to help curb addiction. 5-HTP is a precursor to melatonin, the neurotransmitter of the sleep cycle. Magnesium, the mineral of calmness, adds another layer of deep sleep and rejuvenation, while SugaVida provides crucial micronutrients. 

Want to take it one step further? Use the adaptogenic herb Gynostemma for your tea base in Spring Dragon Tea. Let the stress of the day roll off your back, and may deep, delta, stage 4 sleep be your new best friend.

Sleeping BeauTea

Jing It Up (options)

Spring Dragon Tea
1 capsule (100mg) 5-HTP
½ tsp Bupleurum & Dragon Bone
1 tsp Mineralife Magnesium
2 tsp SugaVida

Gather Up

1 cup (250ml) Water
½ cup (120ml) Coconut Milk
½ tsp Awaken the Shen
½ tsp Pearl Powder
½ tsp Ashwagandha
1 capsule (200mg) L-Theanine
1 TB Lucuma Powder
½ TB Ghee or SuperFood Shortening
¼ tsp Cinnamon Powder ¼ tsp Vanilla Stevia
¼ tsp Toffee Stevia

Sling It Up

In a small pan, combine the water and coconut milk and bring to a light boil. If you are using Spring Dragon Tea for your base, then bring just the water to a boil and turn the heat off and allow the teabag steep for 5 minutes. Remove the teabag, add the coconut milk, and continue warming to a simmer. 

Place all ingredients in your blender, adding your hot liquid last. Cover the lid with a towel, making sure the lid is vented. Hold the lid down tightly. Blend on the lowest setting, gradually ramping it up to a high speed and blending well, for 30 seconds.

Sweet Potato Naan

Three ingredient SuperFood Naan! These beta-carotene rich Grain-Free Naan rounds double as yummy wraps or tortillas. Switch up the spices for either a sweet or savory bread or crust. The water content of the sweet potato is uber important. Therefore, the raw sweet potatoes MUST be steamed and not baked, to create the mash. These Naan remain soft and pliable for sandwiches, wraps or add a sliced baked apple for an apple pie on the fly! 

Sweet Potato Naan

Gather Up

  • 2 cups (500g) Sweet Potato, steamed & mashed
  • 2 cups (250g) Cassava Flour
  • 1 TB Psyllium Husk Powder
  • ¼ tsp Cinnamon or Cumin (optional)
  • Pinch of Sea Salt

Sling It Up

Place two whole, unpeeled medium-sized sweet potatoes in a covered pot, fitted with a steamer basket. Do not allow the sweet potatoes to sit in the water, steam until fully fork tender. Once tender, slide the peels off while they are still hot and mash with a fork in a medium-sized bowl. While still hot, quickly mix in the rest of your ingredients until it forms a soft dough. 

With floured hands and on parchment paper, roll into a log shape and divide into six even sections. With your hands, form each section into a round disk. One by one roll out each disk into a ¼ inch thick, round tortilla. Place the finished tortilla into a deep dish or bowl, lined and covered by two clean dish towels to maintain warmth. Stack each tortilla on top of the last one in the bowl, until all six are completed and remain covered.

Heat a skillet or crepe pan over medium heat. Using a coconut oil spray, very lightly spray your pan. Cook each flatbread, one at a time, flipping each one every 30 seconds. They may balloon up as the heat releases the steam, after the second flip. Keep flipping them until they are cooked through and still pliable. (This takes a few flips on each side, depending on how wet your sweet potatoes were). If they are sticking, adjust your heat accordingly. 

Keep them warm by stacking them as each is finished in the same towel-lined bowl. They are now ready to eat and they freeze beautifully for later use. They will keep in the refrigerator in a sealed container for 5-7 days. 

Sweet Potato Naan

Whipped Cream 101

Lauric, capric and caprylic fatty acids never tasted so good! Heart healthy, brain boosting and fat burning, Whipped Cream is back on the menu! You can create this Coconut Whipped Cream in a stand mixer, with an electric hand mixer or an immersion blender. Creating flavored Whipped Creams becomes limitless with flavored liquid stevia, organic extracts, essential oils, powderized freeze-dried fruit and herbs… and don’t forget cacao powder, Chocolate Whipped Cream is a heavenly ketogenic treat! Want a Raspberry Cream? Simply whirl the freeze dried fruit in your clean spice or coffee grinder until it is a fine powder, stop the mixer and sift the powder into the cream in the last few minutes of whipping, then continue whipping until fully incorporated. Chef Note - All powders should be sifted to create a smooth flavored Whipped Cream.

Whipped Cream 101

Gather Up

2 cups (500ml) Coconut Cream (from 2 cans of Coconut Milk, chilled in refrigerator overnight)
½ tsp Vanilla Stevia
½ tsp Pearl Powder (optional)

Jing It Up (Choose One)

2-3 TB powderized/sifted freeze dried Fruit of choice  
2-3 TB Cacao Powder, sifted
1 TB Arnox Advantage

For Wildberry Cream - 1 tsp Miracle Reds, 2 TB Raspberry Powder, with 1 TB Blueberry Powder

Sling It Up   

Without shaking the cans of chilled coconut milk, carefully open them, and scoop out just the coconut cream, collected from the top of the can. Save the remaining coconut water for future recipes or to thin your coconut cream while whisking, if needed.

With the whisk attached, place coconut cream into the bowl of your stand mixer. Beat on high speed. Add the vanilla stevia, pearl powder and any additional flavors or powder you wish to infuse (a teaspoon at a time) after about 3 minutes, by stopping the mixer, scraping down the sides and adding additional sweetener to balance the powders you have chosen. It is ready once the coconut cream has expanded in volume, and makes “stiff peaks.”

If the coconut cream has not increased in volume after about 4 minutes of whisking, then add 1 teaspoon at a time of the remaining coconut water to get a lighter consistency that will whip up and expand. However, know that too much coconut water will make it too thin and no “Whip Cream” will form. 

Transfer to a piping bag, or store in an airtight container in the refrigerator for up to a week.